
Outlook 2010 and 2013 Exchange Profile Setup
If the Cname (Autodiscover) record for the domain has been created at the DNS you will be able to use the autodiscover function in Outlook to automatically configure the profile. If it was not created at the DNS or if your account does not require a Cname then you can scroll down to manually configure the profile for Outlook.
Set up your profile automatically
1) Go to Start-> Control Panel and launch the Mail applet.
2) Click on the Show Profile button.
3) Click the Add button.
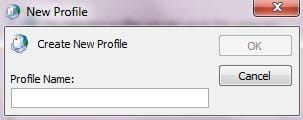
4) The New Profile window will pop up.
In the Profile Name Field enter the name of the user then click OK.
5) At the Auto Account Setup enter in the Name, Email Address and Password of the mailbox.
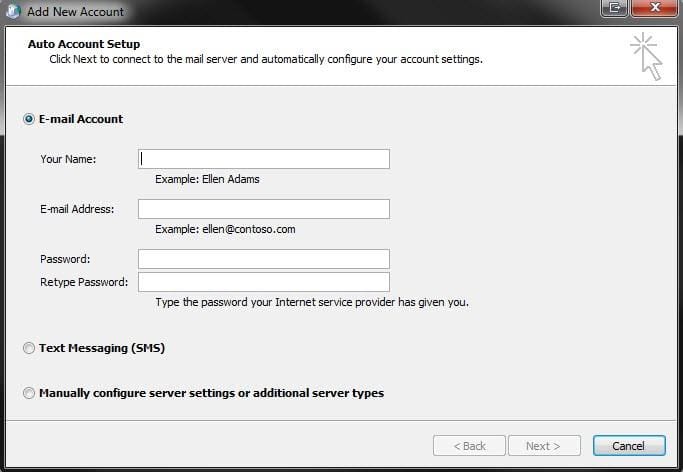
When the information has been entered continue by clicking the Next button.
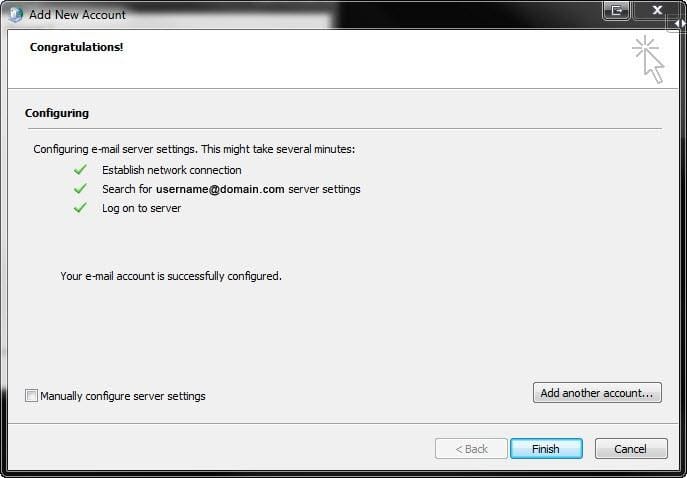
Congratulations! You have successfully connected to your mailbox.
You can click FINISH to start using Outlook.
Set up your profile manually
1) Go to Start-> Control Panel and launch the Mail applet.
2) Click on the Show Profile button.
3) Click the Add button.
4) The New Profile window will pop up.
In the Profile Name field enter the name of the user then click OK.
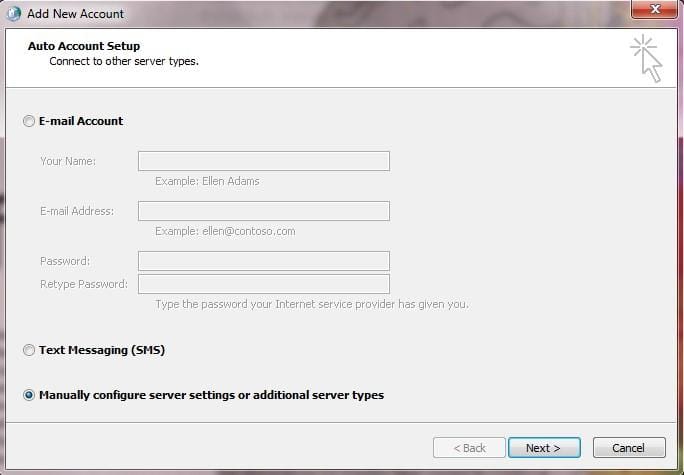
5) In the Add New Account window select Manually configure server settings or additional server types.
6) Select Microsoft Exchange or compatible service.
7) In the Server field enter the following:
outlook.sh5.cloudhostsite.com
8) In the User Name field enter in the full email address of the user.
9) Click the More Settings button.
10) In the following window select the Connections tab.
Put a check in the box next to Connect to Microsoft Exchange using HTTP then click on the Exchange Proxy Settings button.
11) Next to https:// enter: mail.sh5.cloudhostsite.com
Put a check in Only connect to proxy servers that have this principal names in their certificate:
In the field below add the following:
msstd:mail.sh5.cloudhostsite.com
Select On fast and On slow networks, connect using HTTP first, then connect using TCP/IP.
In the Proxy Authentication Setting select the drop down box and choose Basic Authentication.
12) When completed click on OK. Then click on OK in the Connections tab.
13) This will bring you back to the Server Settings window.
Click on Check Name.
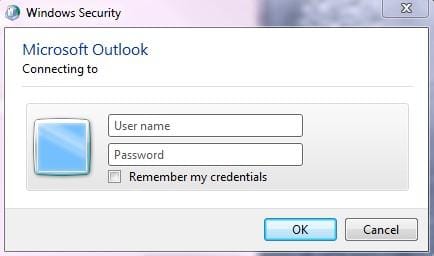
14) When prompted enter in your full email address and password
Click OK.
When Outlook makes a successful connection to the mailbox it will underline the Server address and Username.
Click Next.
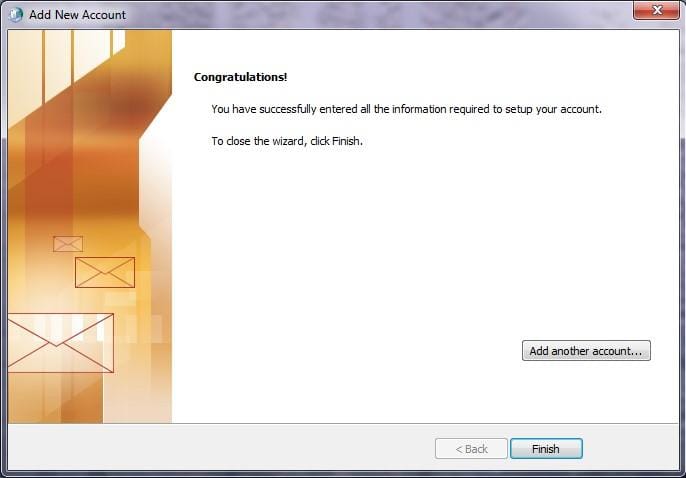
Congratulations! You have successfully connected to your mailbox.
You can click on Finish and start using Outlook.
0
0