
Enabling Sucuri DNS
Using Sucuri’s DNS infrastructure is pretty simple, after you have added a new site or just want to use it on an existing domain, go to Settings on your CloudProxy dashboard and then to DNS. You will see this:

Select “Are you sure to continue” box and click on Proceed.
Note: that this will not change your name servers automatically. After that you will see a screen similar to this:
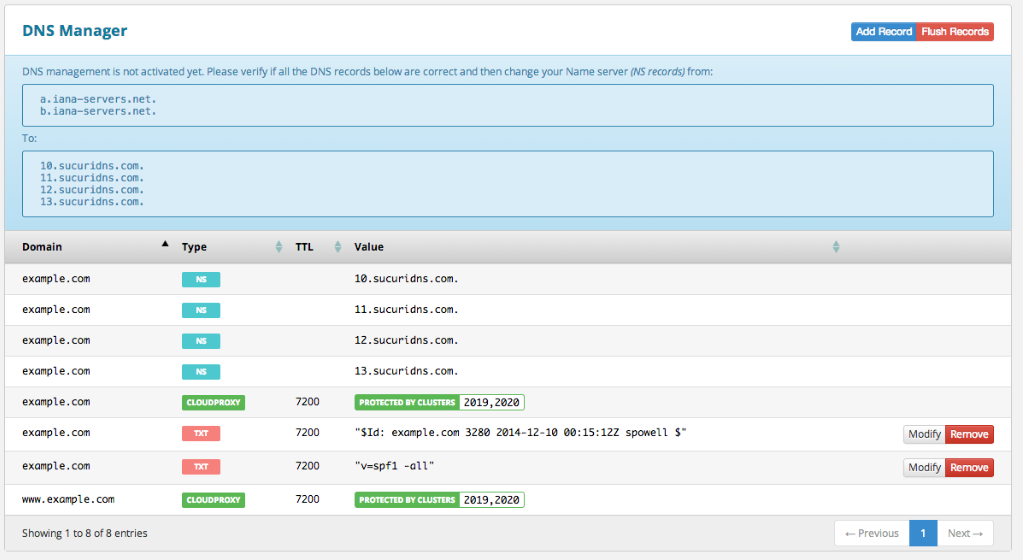
Sucuri’s system will try to collect all of your existing records but if you see anything missing you can manually add a new record.
After you finish editing your records you can change your name server to Sucuri’s DNS servers:
10.sucuridns.com.
11.sucuridns.com.
12.sucuridns.com.
13.sucuridns.com.
Once the name servers have been changed and the DNS propagation has finished, you will see the following image instead of the blue warning from the previous one.

If you need assistance with this, just open a support ticket with us.
0
0